
Win11+Tensorflow2.9.0+CUDA11.2.1+CuDNN8.1.1下载安装教程
版本对应表:https://tensorflow.google.cn/install/source_windows?hl=en#gpu
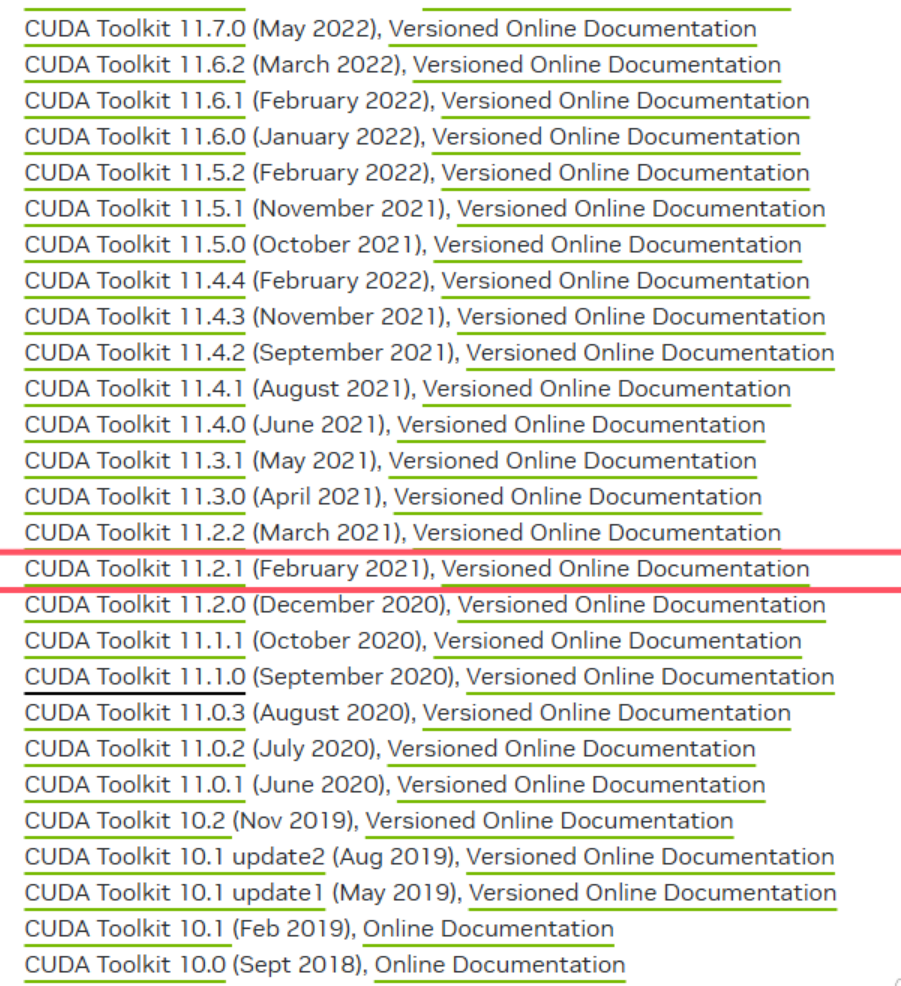
一、CUDA下载及安装(本文CUDA版本为11.2.1)
下载地址:https://developer.nvidia.com/cuda-toolkit-archive/

安装过程注意事项(必须看):https://blog.csdn.net/m0_45447650/article/details/123704930
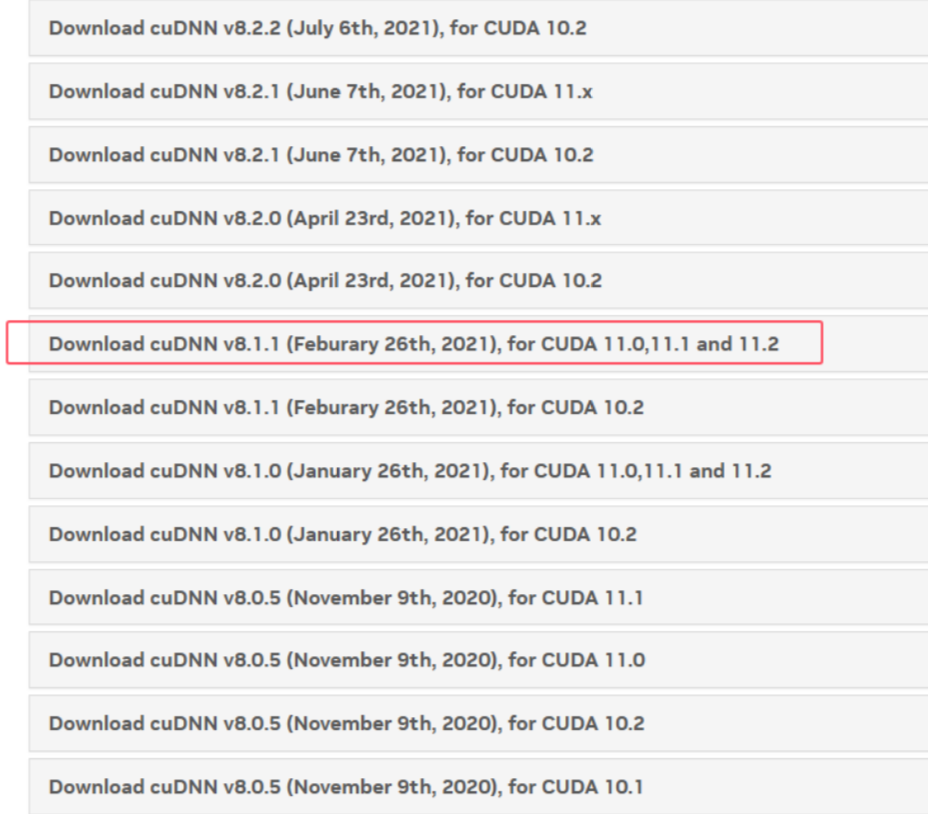
二、CuDNN下载及安装(本文CuDNN版本为8.1.1)
下载地址:https://developer.nvidia.com/rdp/cudnn-archive
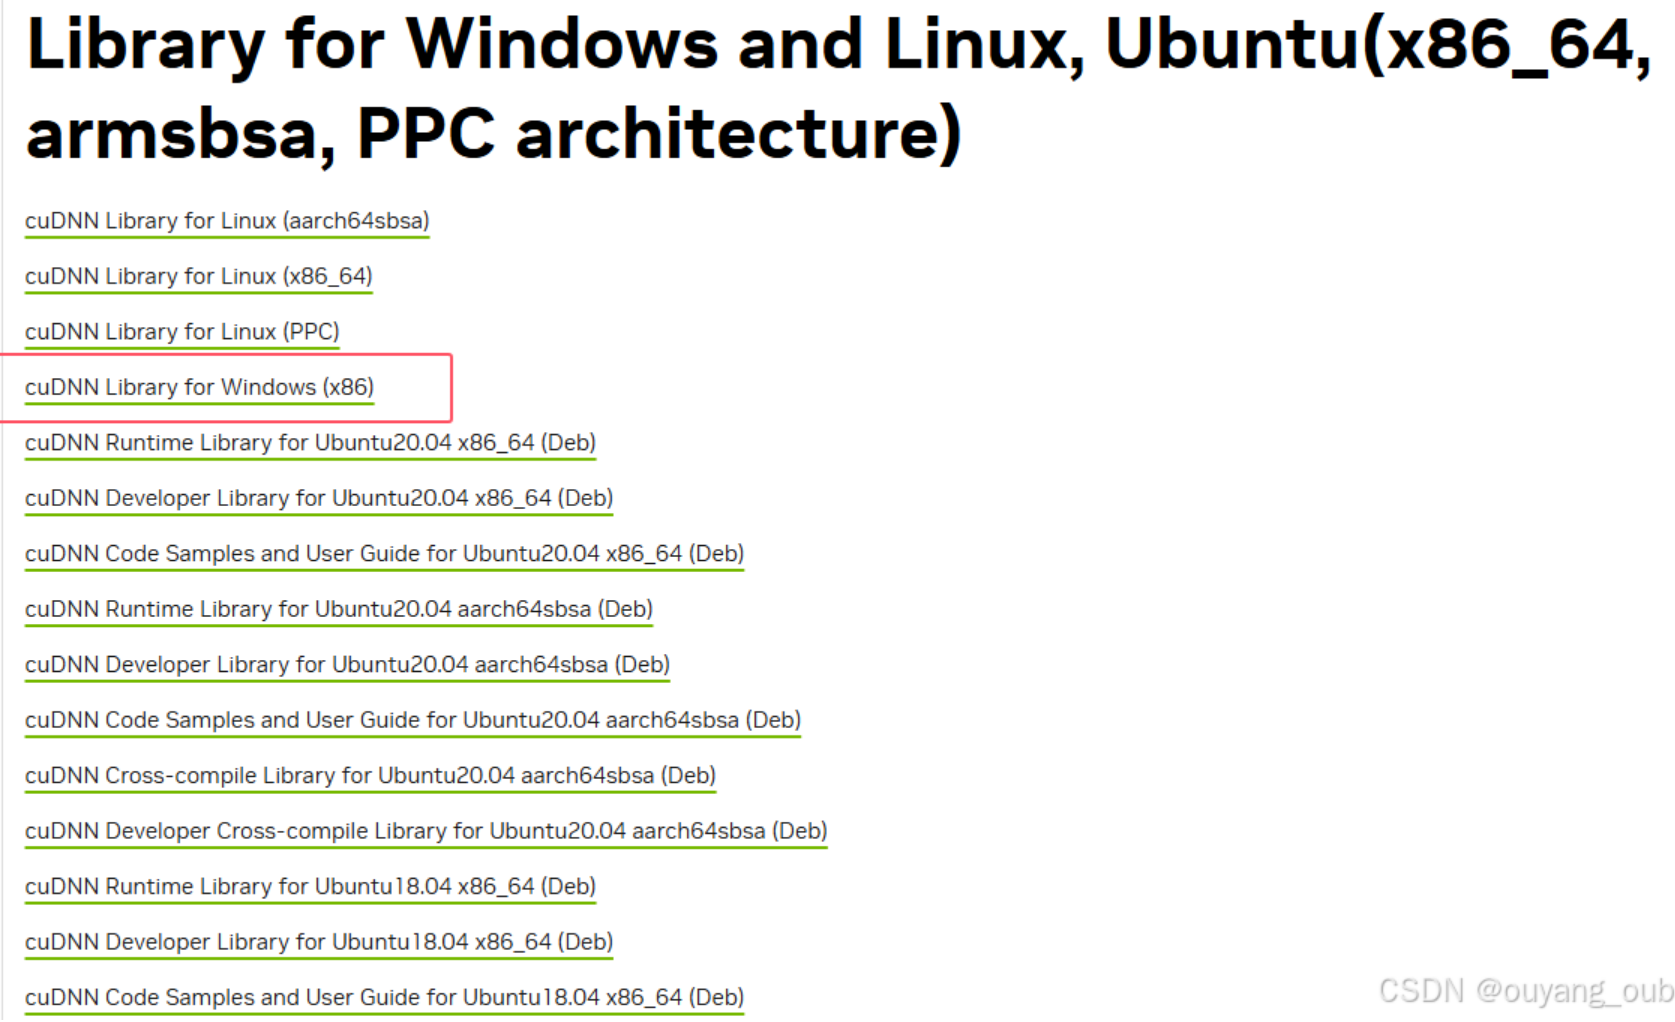
下载好了解压后,将cudnn里面的bin、include、lib文件夹所有内容复制到对应的cuda文件夹下。(注意是将相同名称文件夹中的文件复制过去,压缩包也视为文件,而不是将整个文件夹复制过去,上述安装注意事项链接中也有CuDNN安装注意事项)
三、Tensorflow-gpu下载
打开Anaconda Prompt
创建虚拟环境
conda create --name py39 python=3.9  //创建虚拟环境,这里使用3.9
activate py39  //激活环境
pip install tensorflow-gpu==2.9.0 -i https://pypi.mirrors.ustc.edu.cn/simple  //从中科大镜像源下载tensorflow-gpu2.9.0
在Anaconda Prompt中继续输入python,出现如下界面后继续:

继续输入:
import tensorflow as tf
print("TensorFlow版本:", tf.__version__)
print("可用GPU设备:", tf.config.list_physical_devices('GPU'))
输出结果为:
四、测试是否安装成功(使用Spyder)
1.测试是否安装成功
import tensorflow as tf


print(tf.__version__)
print(tf.test.gpu_device_name())
print(tf.config.experimental.set_visible_devices)
print('GPU:', tf.config.list_physical_devices('GPU'))
print('CPU:', tf.config.list_physical_devices(device_type='CPU'))
print(tf.config.list_physical_devices('GPU'))
print(tf.test.is_gpu_available())
print("Num GPUs Available: ", len(tf.config.experimental.list_physical_devices('GPU')))
2、测试Tensorflow-gpu计算速度
import tensorflow as tf
import timeit

#指定在cpu上运行
def cpu_run():
    with tf.device('/cpu:0'):
        cpu_a = tf.random.normal([10000, 10000])
        cpu_b = tf.random.normal([10000, 2000])
        c = tf.matmul(cpu_a, cpu_b)
    return c

#指定在gpu上运行
def gpu_run():
    with tf.device('/gpu:0'):
        gpu_a = tf.random.normal([10000, 10000])
        gpu_b = tf.random.normal([10000, 2000])
        c = tf.matmul(gpu_a, gpu_b)
    return c

cpu_time = timeit.timeit(cpu_run, number=100)
gpu_time = timeit.timeit(gpu_run, number=100)
print("cpu:", cpu_time, "  gpu:", gpu_time)